Subscribe to our newsletter and get proven marketing strategies for growing your business.
Important: If you haven't added your WhatConverts tracking code to your website, add your tracking script. If you are using the WhatConverts WordPress Plugin, you will want to deactivate the plugin and place your WhatConverts Tracking Code above your Calendly Embed Code.
1Go to the page your Calendly appointment scheduler is on. Right-click and select "Inspect". Copy the iframe Source URL. Paste the URL to an empty Text file.
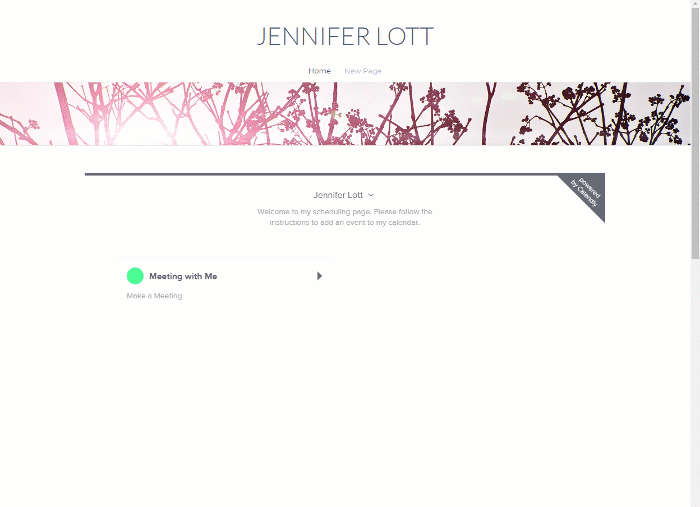
2Paste this code onto the page where your Calendly page is located (replace the Calendly embed code with the copied variables). Make sure to replace TheCopiedIFrameSourceURL with the iframe Source URL from Step 1.
<iframe id="iframe-website" width="100%" height="800" frameborder="0"></iframe>

<script type="text/javascript">

wc_iframe_ypbib('TheCopiedIFrameSourceURL','iframe-website');

</script>
Refresh your page and submit a test appointment.
3Go to Zapier and create a zap with "Calendly" as your Trigger app and "Invitee Created" as the Trigger Event. Connect your Calendly account and click "Continue". Click "Test & Review. Review your test appointment details. Click "Continue".
4Select "WhatConverts" as the Action App and "Create Lead" as the Action Event. Connect your WhatConverts account.
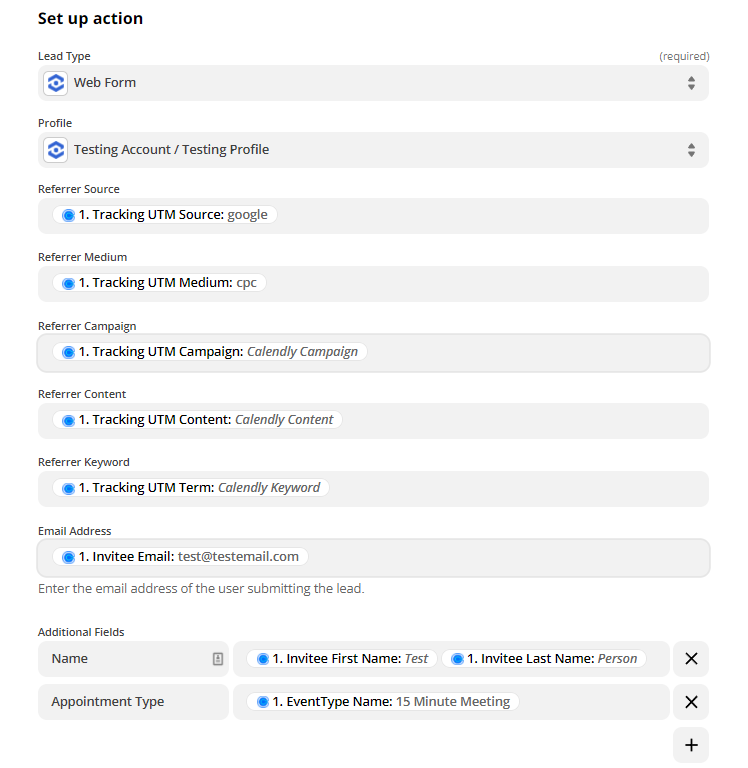
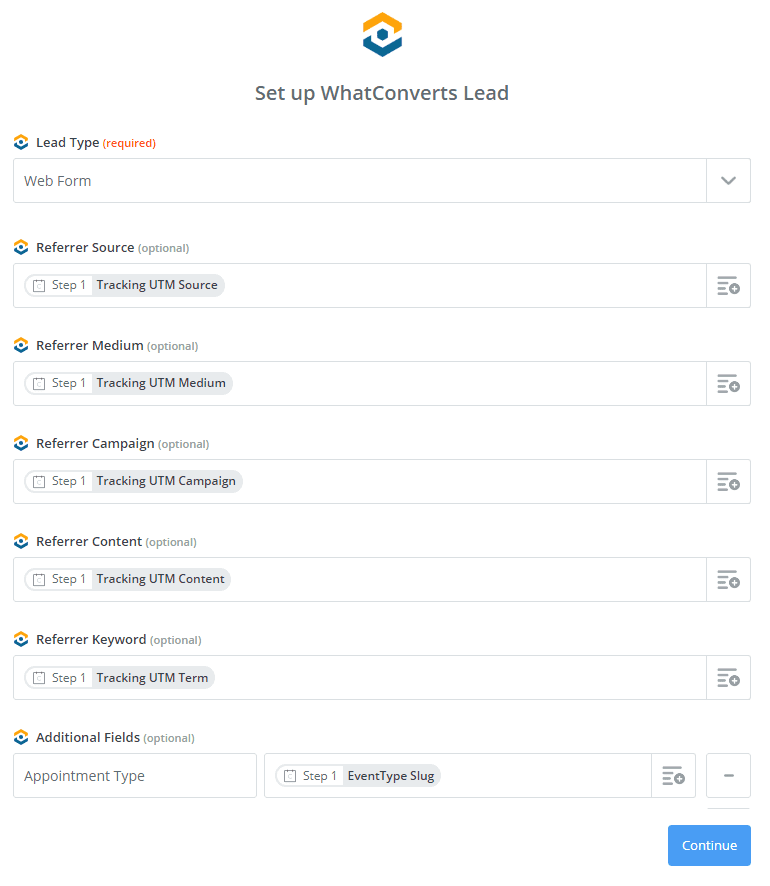
On the Set up your WhatConverts Lead with the following:
Click "Continue". Review your information and click "Test & Continue".Turn your Zap "On".
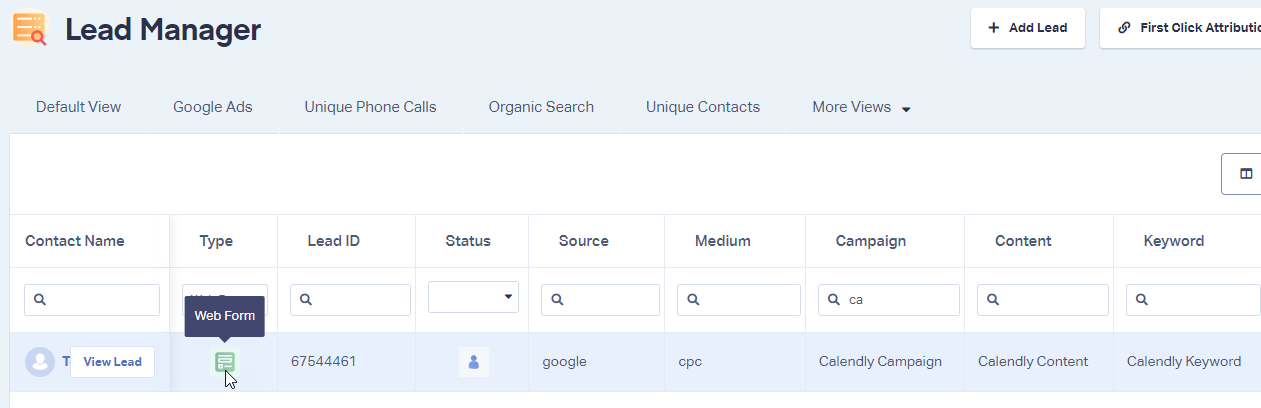
5Log into the WhatConverts profile you sent the test appointment to. Click "Leads" in the top menu. Under Lead Manager, locate and review the Calendly appointment form.
If you have any questions, please contact us here: Contact WhatConverts Support or email support@whatconverts.com
Integrating your Calendly appointment calendar on your site with WhatConverts lets you see all of your incoming appointments and their source in your WhatConverts dashboard. You'll first need a Zapier account to get started.
1Go to the page your Calendly appointment scheduler is on. Right-click and select "Inspect". Copy the iframe Source URL. Paste the URL to an empty Text file.
2Paste this code onto the page where your Calendly page is located (replace the Calendly embed code with the copied variables). Make sure to replace TheCopiedIFrameSourceURL with the iframe Source URL from Step 1.
<iframe id="iframe-website" width="100%" height="800" frameborder="0"></iframe>

<script type="text/javascript">

wc_iframe_ypbib('TheCopiedIFrameSourceURL','iframe-website');

</script>
Refresh your page and submit a test appointment.
3Go to Zapier and create a zap with "Calendly" as your Trigger app and "Invitee Created" as the Trigger. Connect your Calendly account and click "Continue". Click "Test & Review and click the gray down arrow to view your test appointment details. Select the "Radio Button" next to the sample appointment. Click "Done".
4Click "Do this..." and add an Action Step with "WhatConverts" as the Action App and "Create Lead" as the Action. Connect your WhatConverts account.
On the Set up your WhatConverts Lead with the following:
Click "Continue". Review your information and click "Send Test to WhatConverts". Click "Finish". Name and turn your Zap "On".
One of our marketing experts will give you a full presentation of how WhatConverts can help you grow your business.
Schedule a DemoWhatConverts allows you to pick and choose which forms you would like to track on your site.
Tracking your iframe forms in Google Analytics is important to make sure that you are attributing your conversion goals correctly.
Get email notifications for form submissions and online orders, with marketing data attached.
Subscribe to our newsletter and get proven marketing strategies for growing your business.


